Introduction
When I was assigned the task of migrating our search infrastructure from Algolia to Typesense, I took it as an opportunity to dive deep into self-hosting and managing search at scale. After exploring the setup, deployment, and optimization process, I successfully migrated everything to Typesense, a fast, open-source search engine that gives you full control without the hefty costs.
Our bills for Algolia were around $200-300/Month. After self hosting it came down to mere $10 VPS Cost.
In this blog, I’ll walk you through how I set up and self-hosted Typesense, configured it with Caddy, and got the Dashboard running securely.
To make things smooth, I used Docker Compose to manage containers and Caddy as a reverse proxy for automatic SSL and routing. I also added the Typesense Dashboard a lightweight frontend UI that makes managing collections, documents, and search queries much easier.
Last but not the least I Love Containers.
What is Typesense?
Typesense is an open-source search engine optimized for instant, typo-tolerant, and developer-friendly search. It’s written in C++ and provides a clean RESTful API for indexing and querying data.
Some key features include:
-
Instant search with millisecond response times
-
Typo tolerance and relevance ranking
-
Simple JSON-based API
-
Built-in API key security
-
Open-source and easy to self-host
By self-hosting, you get complete control over configuration, scaling, and security without the recurring costs of managed search platforms.
Prerequisites
Before starting, make sure you have the following:
-
Docker installed on your vps
-
Caddy installed (for reverse proxy & HTTPS)
-
A domain name (optional but recommended for SSL)
-
Basic familiarity with command line and Docker
Tools used:
-
Docker Compose – to orchestrate the Typesense and dashboard containers
-
Caddy – to manage SSL and reverse proxy routes automatically
-
Typesense Dashboard – a frontend to visually manage your data
-
VPS ( EC2, AWS LightSail, Digital Ocean Droplet and Hetzner etc.)
Setting Up Self-Hosted Typesense with Docker and Caddy
Let’s now walk through the full setup step-by-step.
We’ll be creating three services Typesense, Dashboard, and Caddy all orchestrated using Docker Compose.
The Env Config is in the Summary Section
Step: 1 - Setting Up Typesense with Docker Compose
We’ll start by running Typesense inside a Docker container.
This will be our core search engine backend.
typesense: image: typesense/typesense:29.0 restart: on-failure env_file: - .env expose: - "8108" volumes: - ./typesense-data:/data command: "--data-dir /data --api-key=${TYPESENSE_API_KEY} --enable-cors" networks: - typesense-networkExplanation:
-
image: typesense/typesense:29.0— uses the official Typesense Docker image. -
env_file— loads environment variables likeTYPESENSE_API_KEYfrom your.envfile. -
volumes— mounts a local directory./typesense-datato persist indexed data. -
command— sets the data directory, enables CORS, and provides the API key. -
expose: 8108— exposes the internal port for the reverse proxy (not public).
After this step, Typesense will run internally and listen on port 8108 within the Docker network.
Step: 2 - Setting Up Typesense Dashboard Frontend
Next, we’ll set up the Typesense Dashboard a web-based interface to interact with your Typesense instance visually.
dashboard: image: bfritscher/typesense-dashboard:2.1 restart: unless-stopped volumes: - dashboard_data:/srv expose: - "80" env_file: - .env depends_on: - typesense networks: - typesense-networkExplanation:
-
bfritscher/typesense-dashboard— lightweight open-source dashboard for Typesense(You can choose the latest version tag). -
Uses the same
.envfile for configuration (so it knows which Typesense host and API key to connect to). -
depends_onensures the dashboard starts only after the Typesense service is ready. -
dashboard_datais mounted as a volume to persist the dashboard’s static files.
After setup, the dashboard runs on port 80 internally, which we’ll expose securely through Caddy.
Step: 3 - Setting Up Caddy as a Reverse Proxy
Finally, we’ll use Caddy to serve both the Typesense API and the Dashboard over HTTPS with automatic SSL certificates from Let’s Encrypt.
caddy: image: caddy:2.7-alpine restart: unless-stopped ports: - "80:80" - "443:443" volumes: - ./Caddyfile:/etc/caddy/Caddyfile:ro - caddy_data:/data - caddy_config:/config - dashboard_data:/srv:ro networks: - typesense-network depends_on: - typesense - dashboardExplanation:
-
The Caddy container automatically handles HTTP → HTTPS redirection and SSL certificates.
-
The
Caddyfiledefines how traffic is routed to both services. -
depends_onensures Caddy starts only after both the backend and dashboard are ready.
Caddyfile Configuration
Create a Caddyfile in the root of your directory
Recommended Configuration
I recommend using a subdomain for your Typesense API, for example, typesense-api.yourdomain.com.
Here’s how you can adjust your Caddyfile to accomplish this:
Step: 1 - Update DNS
First, ensure you have DNS “A” records for both the dashboard and the API pointing to your VPS’s IP address.
-
dashboard.yourdomain.com -> YOUR_VPS_IP
-
typesense-api.yourdomain.com -> YOUR_VPS_IP
Step: 2 - Update your Caddyfile
Replace the contents of your Caddyfile with something like this. This will configure Caddy to route traffic for the dashboard and the Typesense API to the correct containers.
Here’s your Caddyfile configuration:
# Route traffic for the dashboarddashboard.yourdomain.com {    # Proxy requests to the dashboard container on its internal port 80    reverse_proxy dashboard:80}
# Route traffic for the Typesense APItypesense-api.yourdomain.com {    # Proxy requests to the typesense container on its internal port 8108    reverse_proxy typesense:8108}
Remember to replace dashboard.yourdomain.com and typesense-api.yourdomain.com with your actual domains.
Caddy will automatically handle provisioning and renewing TLS certificates for both subdomains.
Step: 3 - Connect from the Dashboard
After you restart your services with docker compose up -d, you can now connect from the dashboard UI using:
-
Typesense Host: https://typesense-api.yourdomain.com
-
Port: 443
-
Protocol: https
-
API Key: Your TYPESENSE_API_KEY
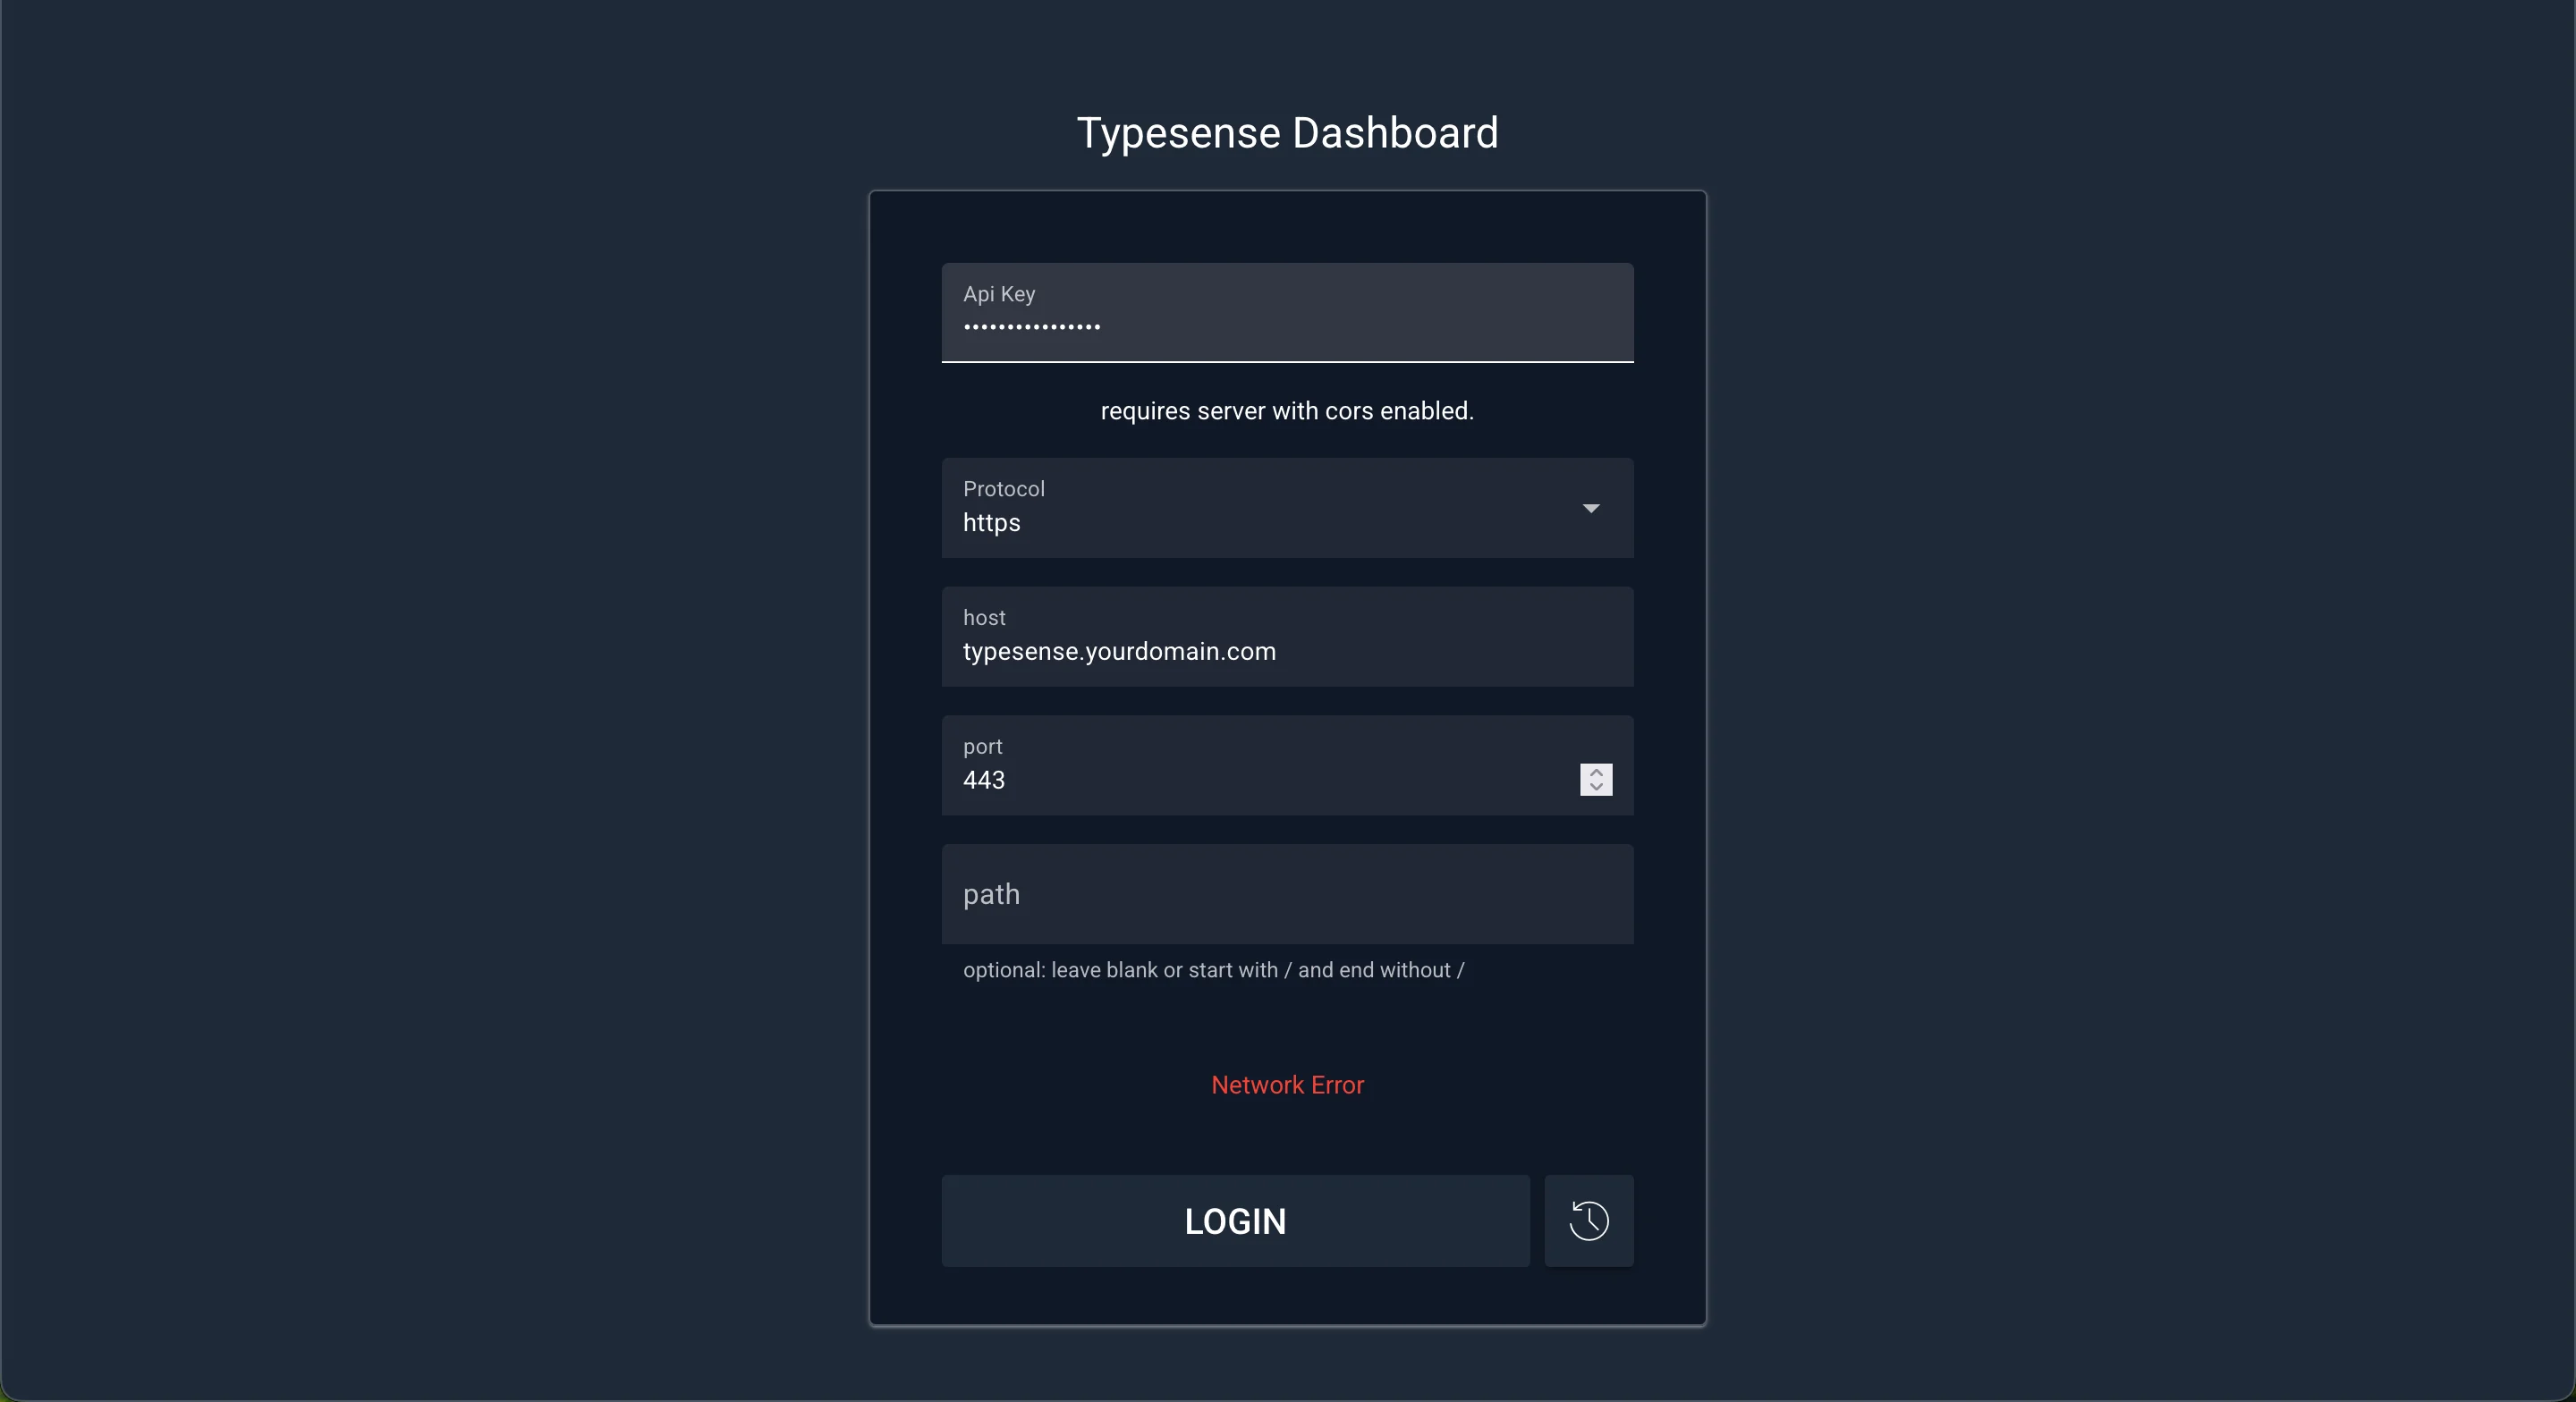
Leave the Path field empty just fill the all other fields and you’re good to go!
By default the API key is set to xyz, for generating your own api key use this curl command.
curl 'http://localhost:8108/keys' \ -X POST \ -H "X-TYPESENSE-API-KEY: ${TYPESENSE_API_KEY}" \ -H 'Content-Type: application/json' \ -d '{"description":"Admin key.","actions": ["*"], "collections": ["*"]}'Deploying on Your VPS
If Docker isn’t already installed, run the following commands on your VPS:
Now that we’ve written our configuration files, it’s time to deploy everything on a VPS (Virtual Private Server).
Step: 1 - Install Docker and Docker Compose
If Docker isn’t already installed, run the following commands on your VPS:
# Update system packagessudo apt update -y
# Install Dockercurl -fsSL https://get.docker.com -o get-docker.shsudo sh get-docker.sh
# Install Docker Compose pluginsudo apt install docker-compose-plugin -y
Once installed, verify everything is working:
docker --versiondocker compose versionYou should see version numbers printed that means Docker is ready to go.
Step: 2 - Clone Your Project
Next, clone your project repository that contains the docker-compose.yml and Caddyfile.
git clone https://github.com/<your-username>/<your-repo>.gitcd <your-repo>Make sure your .env file is also present in the root directory
Step: 3 - Running the Setup
Once everything is in place, just run:
sudo docker compose up -dDocker will automatically pull the images for Typesense, Dashboard, and Caddy, and start all three services in the background.
You can check if everything is running with:
sudo docker psYou should see three containers running one each for:
-
typesense -
dashboard -
caddy
Step: 4 - Access Your Setup
Once the setup is live:
Then open:
-
Dashboard: dashboard.yourdomain.com → to access the dashboard UI
-
API Endpoint: typesense-api.yourdomain.com/health → to check if Typesense is up (
{"ok": true})
If everything’s configured correctly, Caddy will automatically issue SSL certificates, and you’ll have a fully functional, secure, and visual self-hosted Typesense setup.
Summary
Final Docker Compose File
services:  caddy:    image: caddy:2.7-alpine    restart: unless-stopped    ports:      - "80:80"      - "443:443"    volumes:      - ./Caddyfile:/etc/caddy/Caddyfile:ro      - caddy_data:/data      - caddy_config:/config      - dashboard_data:/srv:ro    networks:      - typesense-network    depends_on:      - typesense      - dashboard
  dashboard:    image: bfritscher/typesense-dashboard:2.1    restart: unless-stopped    volumes:      - dashboard_data:/srv    expose:      - "80"    env_file:      - .env    depends_on:      - typesense    networks:      - typesense-network
  typesense:    image: typesense/typesense:29.0    restart: on-failure    env_file:      - .env    expose:      - "8108"    volumes:      - ./typesense-data:/data    command: "--data-dir /data --api-key=${TYPESENSE_API_KEY} --enable-cors"    networks:      - typesense-network
networks:  typesense-network:    driver: bridge
volumes: caddy_data: caddy_config: dashboard_data:# Route traffic for the dashboarddashboard.yourdomain.com { # Proxy requests to the dashboard container on its internal port 80 reverse_proxy dashboard:80}
# Route traffic for the Typesense APItypesense-api.yourdomain.com { # Proxy requests to the typesense container on its internal port 8108 reverse_proxy typesense:8108}TYPESENSE_API_KEY=YOUR_KEYPUBLIC_PATH=/dashboardTYPESENSE_HOST=typesenseTYPESENSE_PORT=8108TYPESENSE_PROTOCOL=httpReplace the typesense api key with your generated admin api key or by default it is xyz
Example Template Repository
- Visit this link: https://github.com/geekyharsh05/typesense-self-hosted-example
Best Practices & Maintenance
A few things I learned while running this setup:
-
Use persistent volumes for
/dataso you don’t lose indexed data on container restart. -
Keep your API key secret, especially if exposing it to the web.
-
Regularly update images to stay on the latest Typesense version.
-
Backup your data periodically by copying the
/datadirectory. -
Monitor logs via
docker logs typesensefor any indexing or query errors.
Conclusion
Self-hosting Typesense is surprisingly simple specially with Docker and Caddy.
In a few steps, you can have a fully functional, secure, and visually manageable search engine running on your own infrastructure.
It gives you complete control, scalability, and transparency without the high cost of managed search platforms.
If you’re building search into your product, Typesense is absolutely worth exploring.
Special Thanks to Boris Fritscher the creator of typesense dashboard.
If you found this guide helpful, follow me on X. for more developer insights and subscribe for future posts about self-hosted tools, open-source stacks, and dev workflows.